

The job
This one was on the third floor of a triple-decker in Somerville. The homeowner wanted to convert an old tub setup into a proper walk-in shower, and he came to the table knowing his stuff. When we first met, he asked real questions about our experience — especially about the Schluter system, which he’d clearly researched. That’s the kind of conversation I like. We’ve worked with Schluter for years and hold certifications on it, so we were able to walk him through exactly how the waterproofing works and why it lasts. By the end of that first visit, he was confident we were the right crew for the job.
What we ran into
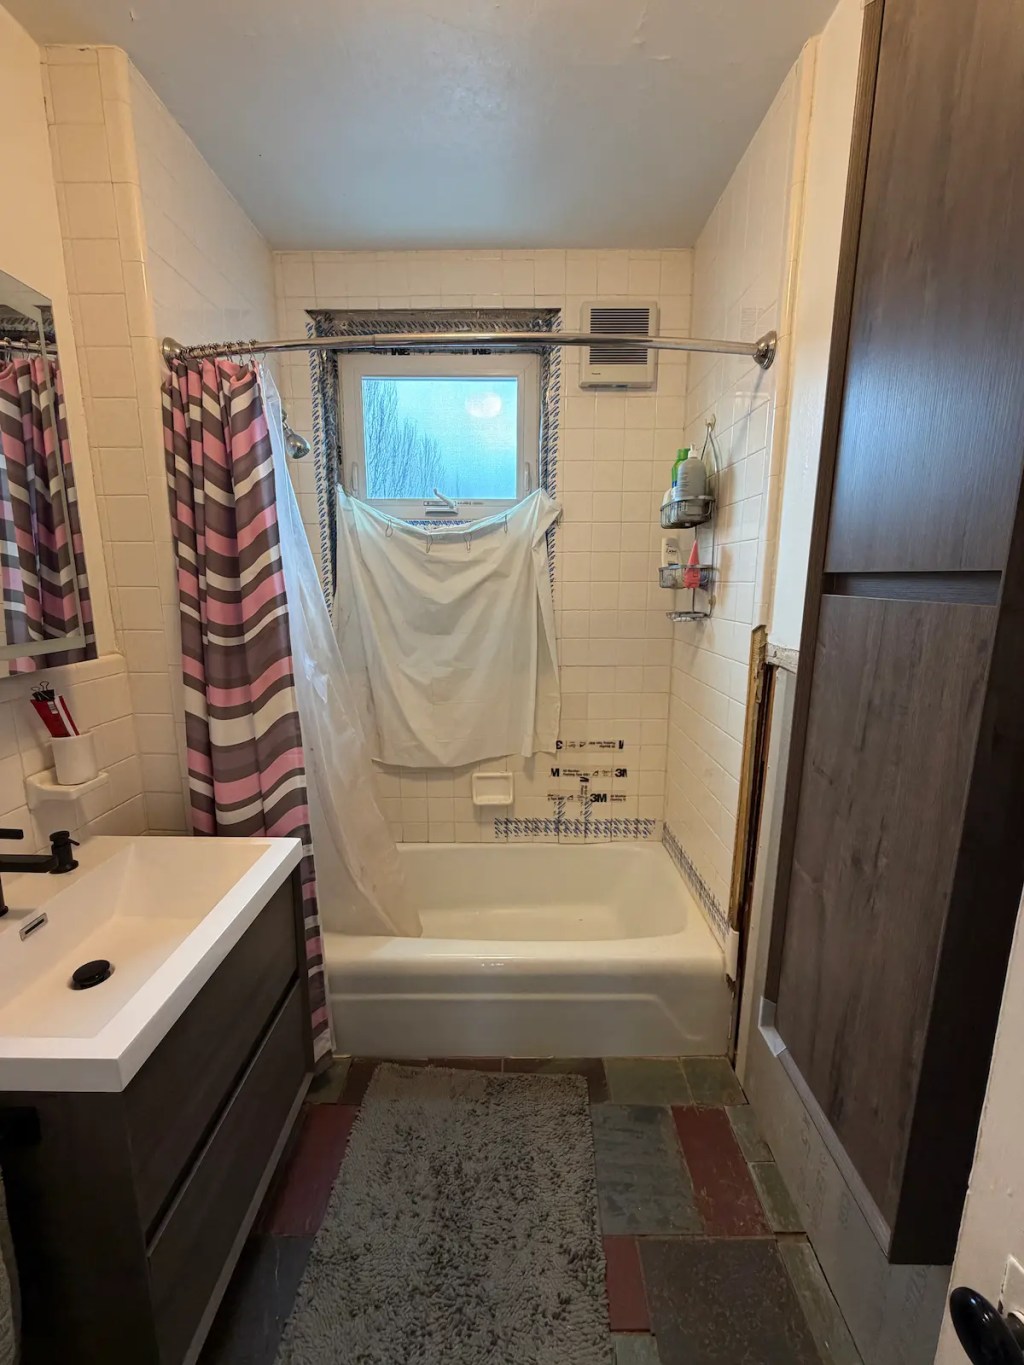
The bathroom wasn’t just dated — it was failing. Wall tiles were popping loose, with some at the bottom literally held on by tape. The floor tiles were lifting too, and water had been working its way into places it never should have reached. My best guess is the bathroom was last done around 30 years back, with patch jobs layered on over the years to keep it limping along.
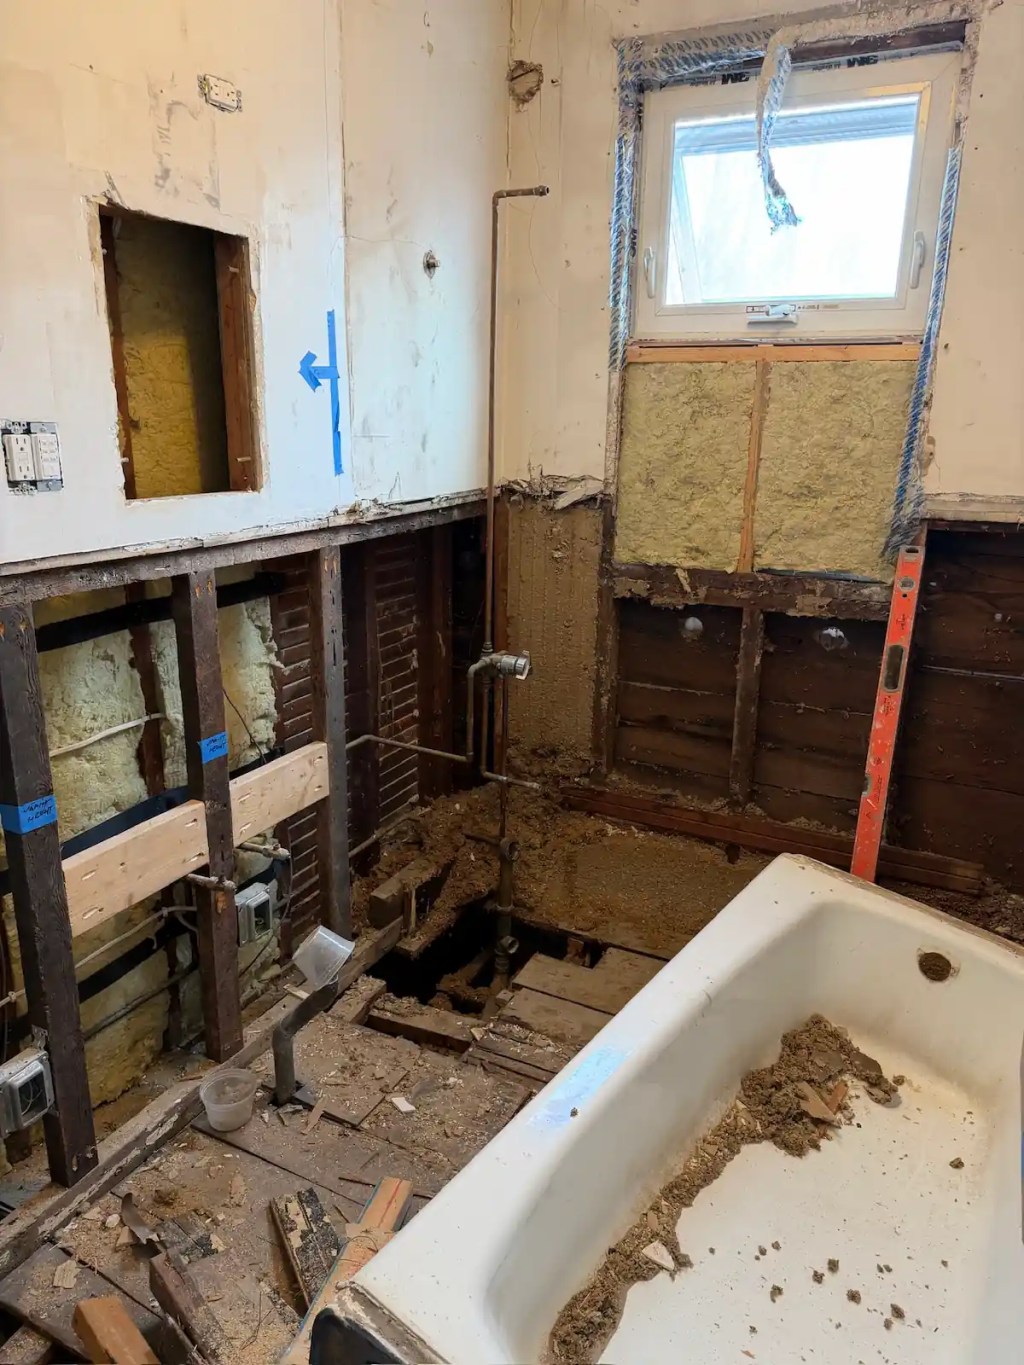
The real story, though, was underneath. Once we pulled the old heavy cast-iron tub — no small feat three floors up — we found a subfloor riddled with problems and rough plumbing that had to be corrected before we could build anything on top of it. On top of that, the walls outside the shower area were crooked and poorly supported. There was no patching our way through this one. It had to come apart and go back together right.

How we handled it
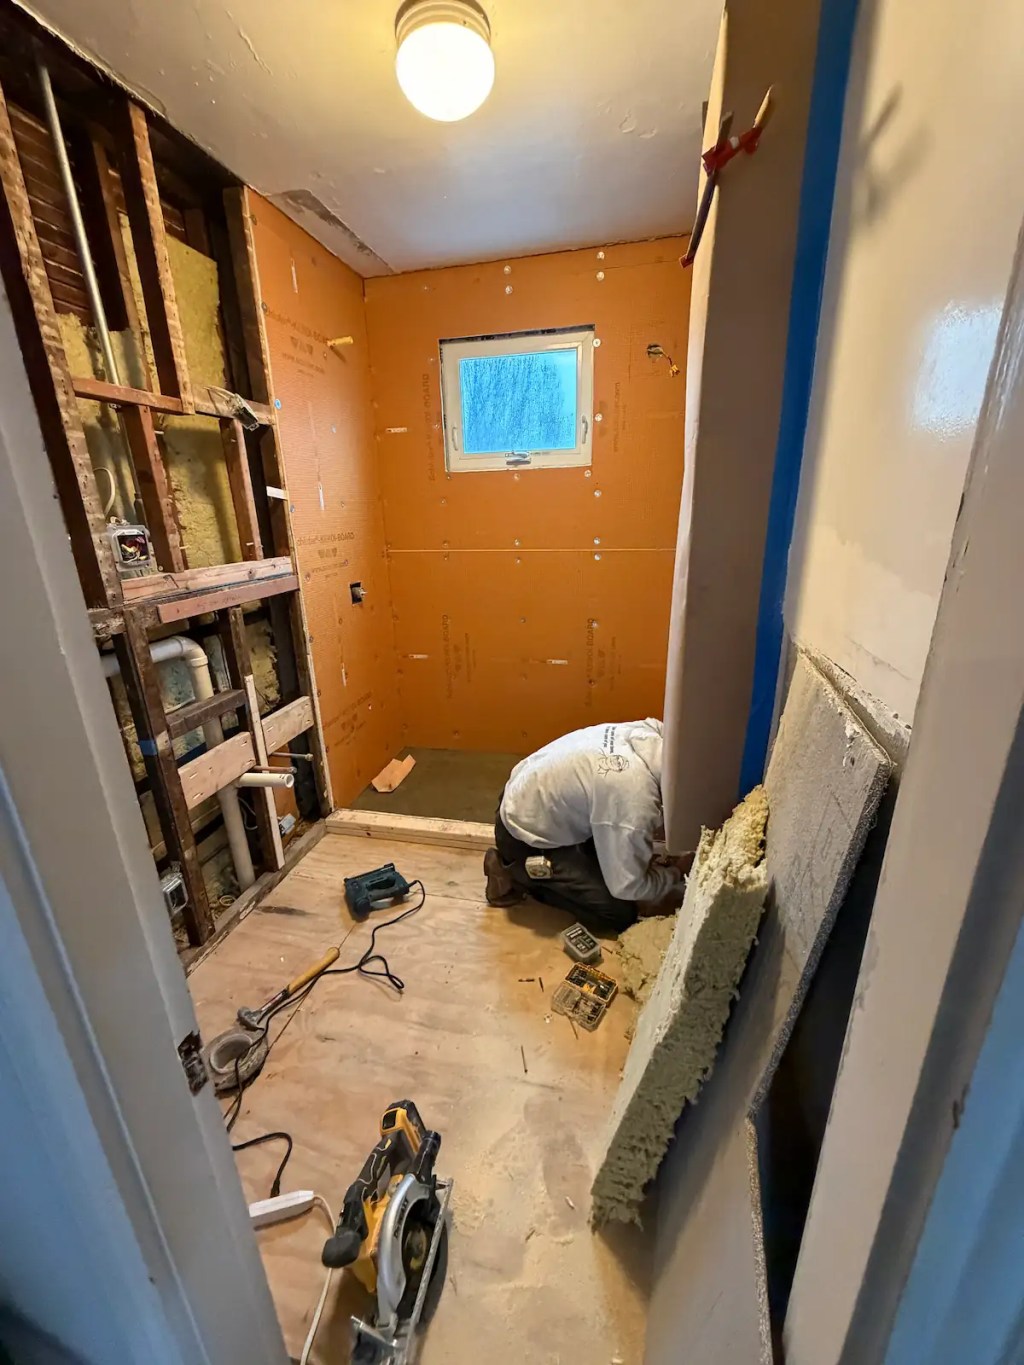
Most of our time on this project went into the part nobody sees. We reinforced the floor structure and laid down 3/4″ plywood to give everything a solid, stable base. We corrected the issues we found in the rough plumbing and subfloor, then rebuilt the out-of-square walls so the whole room was straight and properly supported. We also ran a half-wall of tile around the entire room, which meant bringing those outer walls up to standard too.
With the structure sound, we moved to waterproofing. We prepped the shower walls with the Schluter system — a fully bonded, waterproof assembly that keeps moisture out of the wall instead of trusting it to grout and luck. From there: 12×24 porcelain on the floor, 4×12 white subway tile on the walls, and black trim to tie into the black fixtures and hardware. The shower floor got a linear drain with the pan pitched to it for clean, even drainage.
One honest note: the finished floor just outside the shower sits a touch higher than the original. That came down to the location of the toilet drain, which set our minimum height — we couldn’t go lower without moving plumbing that wasn’t ours to move. It’s a small, deliberate trade-off, and the result is still a clean, level, watertight floor.

The result
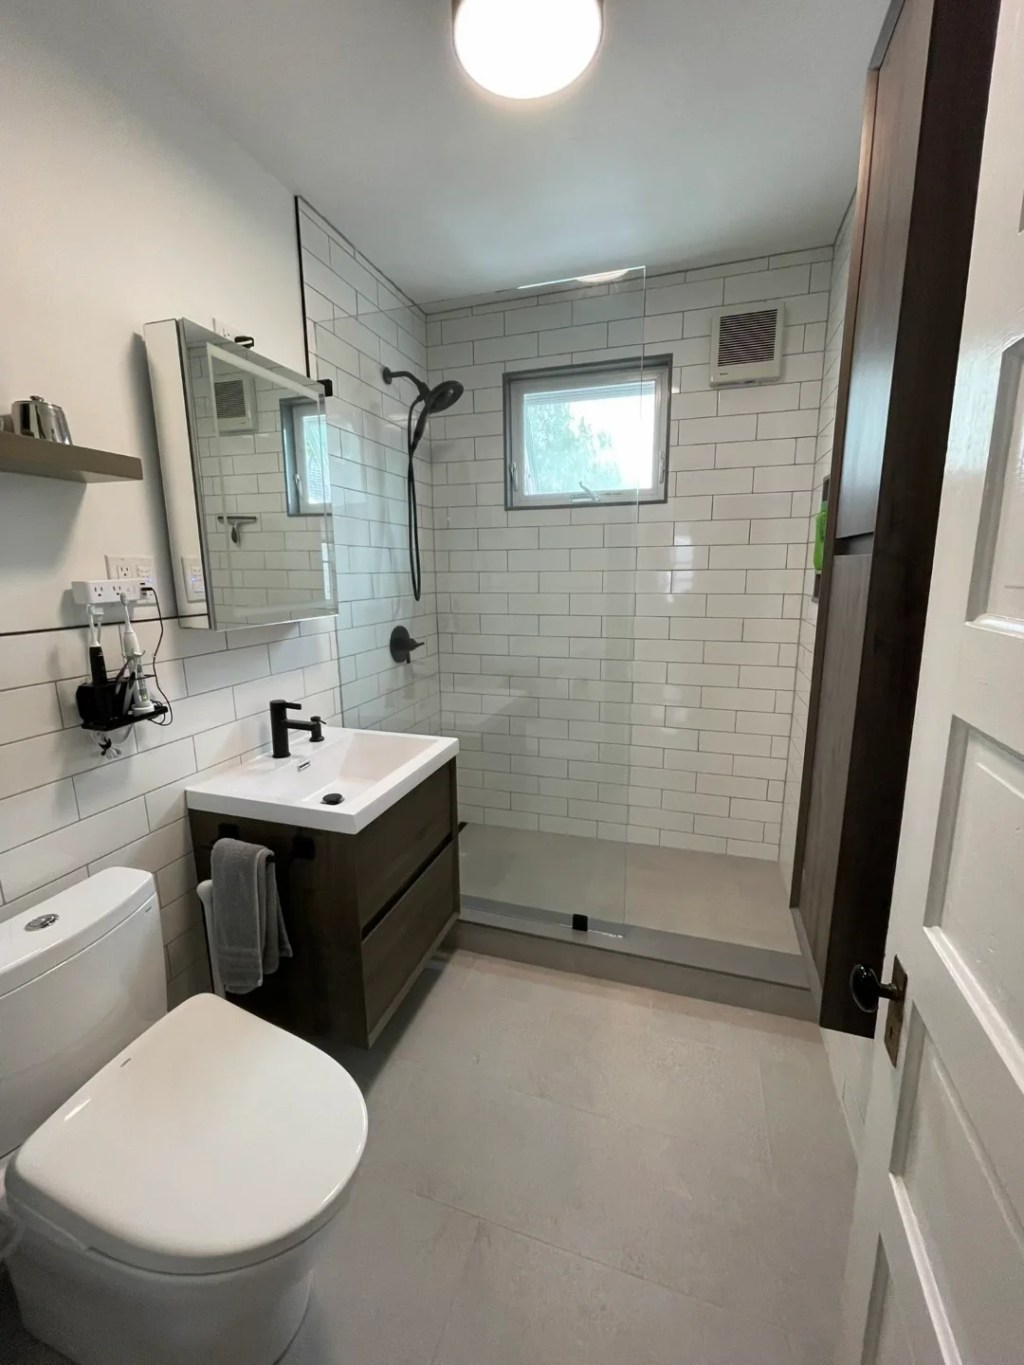
After about two weeks, the room went from a failing, taped-together bathroom to a clean, modern walk-in shower built to last. White subway walls, large-format porcelain floor, black fixtures, glass panel, and a floating vanity — but the part I’m proudest of is the part you can’t see: a solid structure and real waterproofing underneath it all. That’s what makes a bathroom last decades instead of years.
Custom tile vs. an acrylic insert — what actually lasts
If you’re weighing a tub-to-shower conversion, you’ve probably run into the one-day acrylic systems — the kind where a surround gets installed over your existing setup. They’re fast, and for some situations that speed is the whole appeal. But it’s worth understanding the difference before you decide.
The fast systems work by going over what’s already there. The trouble is that on an older home, what’s already there is often the actual problem. This Somerville job is a perfect example: the failure wasn’t the tile you could see, it was the subfloor, the plumbing, and the framing underneath. An insert installed over that would have hidden the problem, not solved it — and the same water damage would have kept going behind a brand-new wall.
That’s the core of how we work: we don’t tile over problems — we fix what’s underneath first. We open the area up, see what we’re really dealing with, and make the structure and waterproofing right before a single tile goes on. It takes longer and it’s more meticulous, and that’s exactly the point. A custom tiled shower built on a sound, properly waterproofed base is a permanent fixture — not a shell sitting on top of an unsolved problem.
Takeaway
If your tile is popping loose or being held up with tape, the problem usually isn’t the tile — it’s what’s behind and beneath it. Tiling over a failing substrate, or covering it with an insert, just buys you a little time before the same problems come back. On an old triple-decker especially, it’s worth opening things up, fixing the structure and waterproofing properly, and doing it once. Done right, you won’t have to think about it again for a very long time.