

This subway tile backsplash in Cohasset, MA looked like a simple swap. The kitchen had a 4×4 tile backsplash set on the diagonal with small blue accent dots, running under the upper cabinets, with maple shaker cabinets and dark granite counters. The homeowner wanted something calmer: a 3×12 warm white ceramic subway tile in a 50% offset, the classic brick pattern. He had already bought the tile.

There was a second wall too, at a built-in desk. That one was bare drywall that had never been tiled, and it was getting the same tile in the same pattern.
After 25 years of tile work, I can tell you the wall decides how a backsplash turns out more than the tile does. This job is a good example.
What we ran into
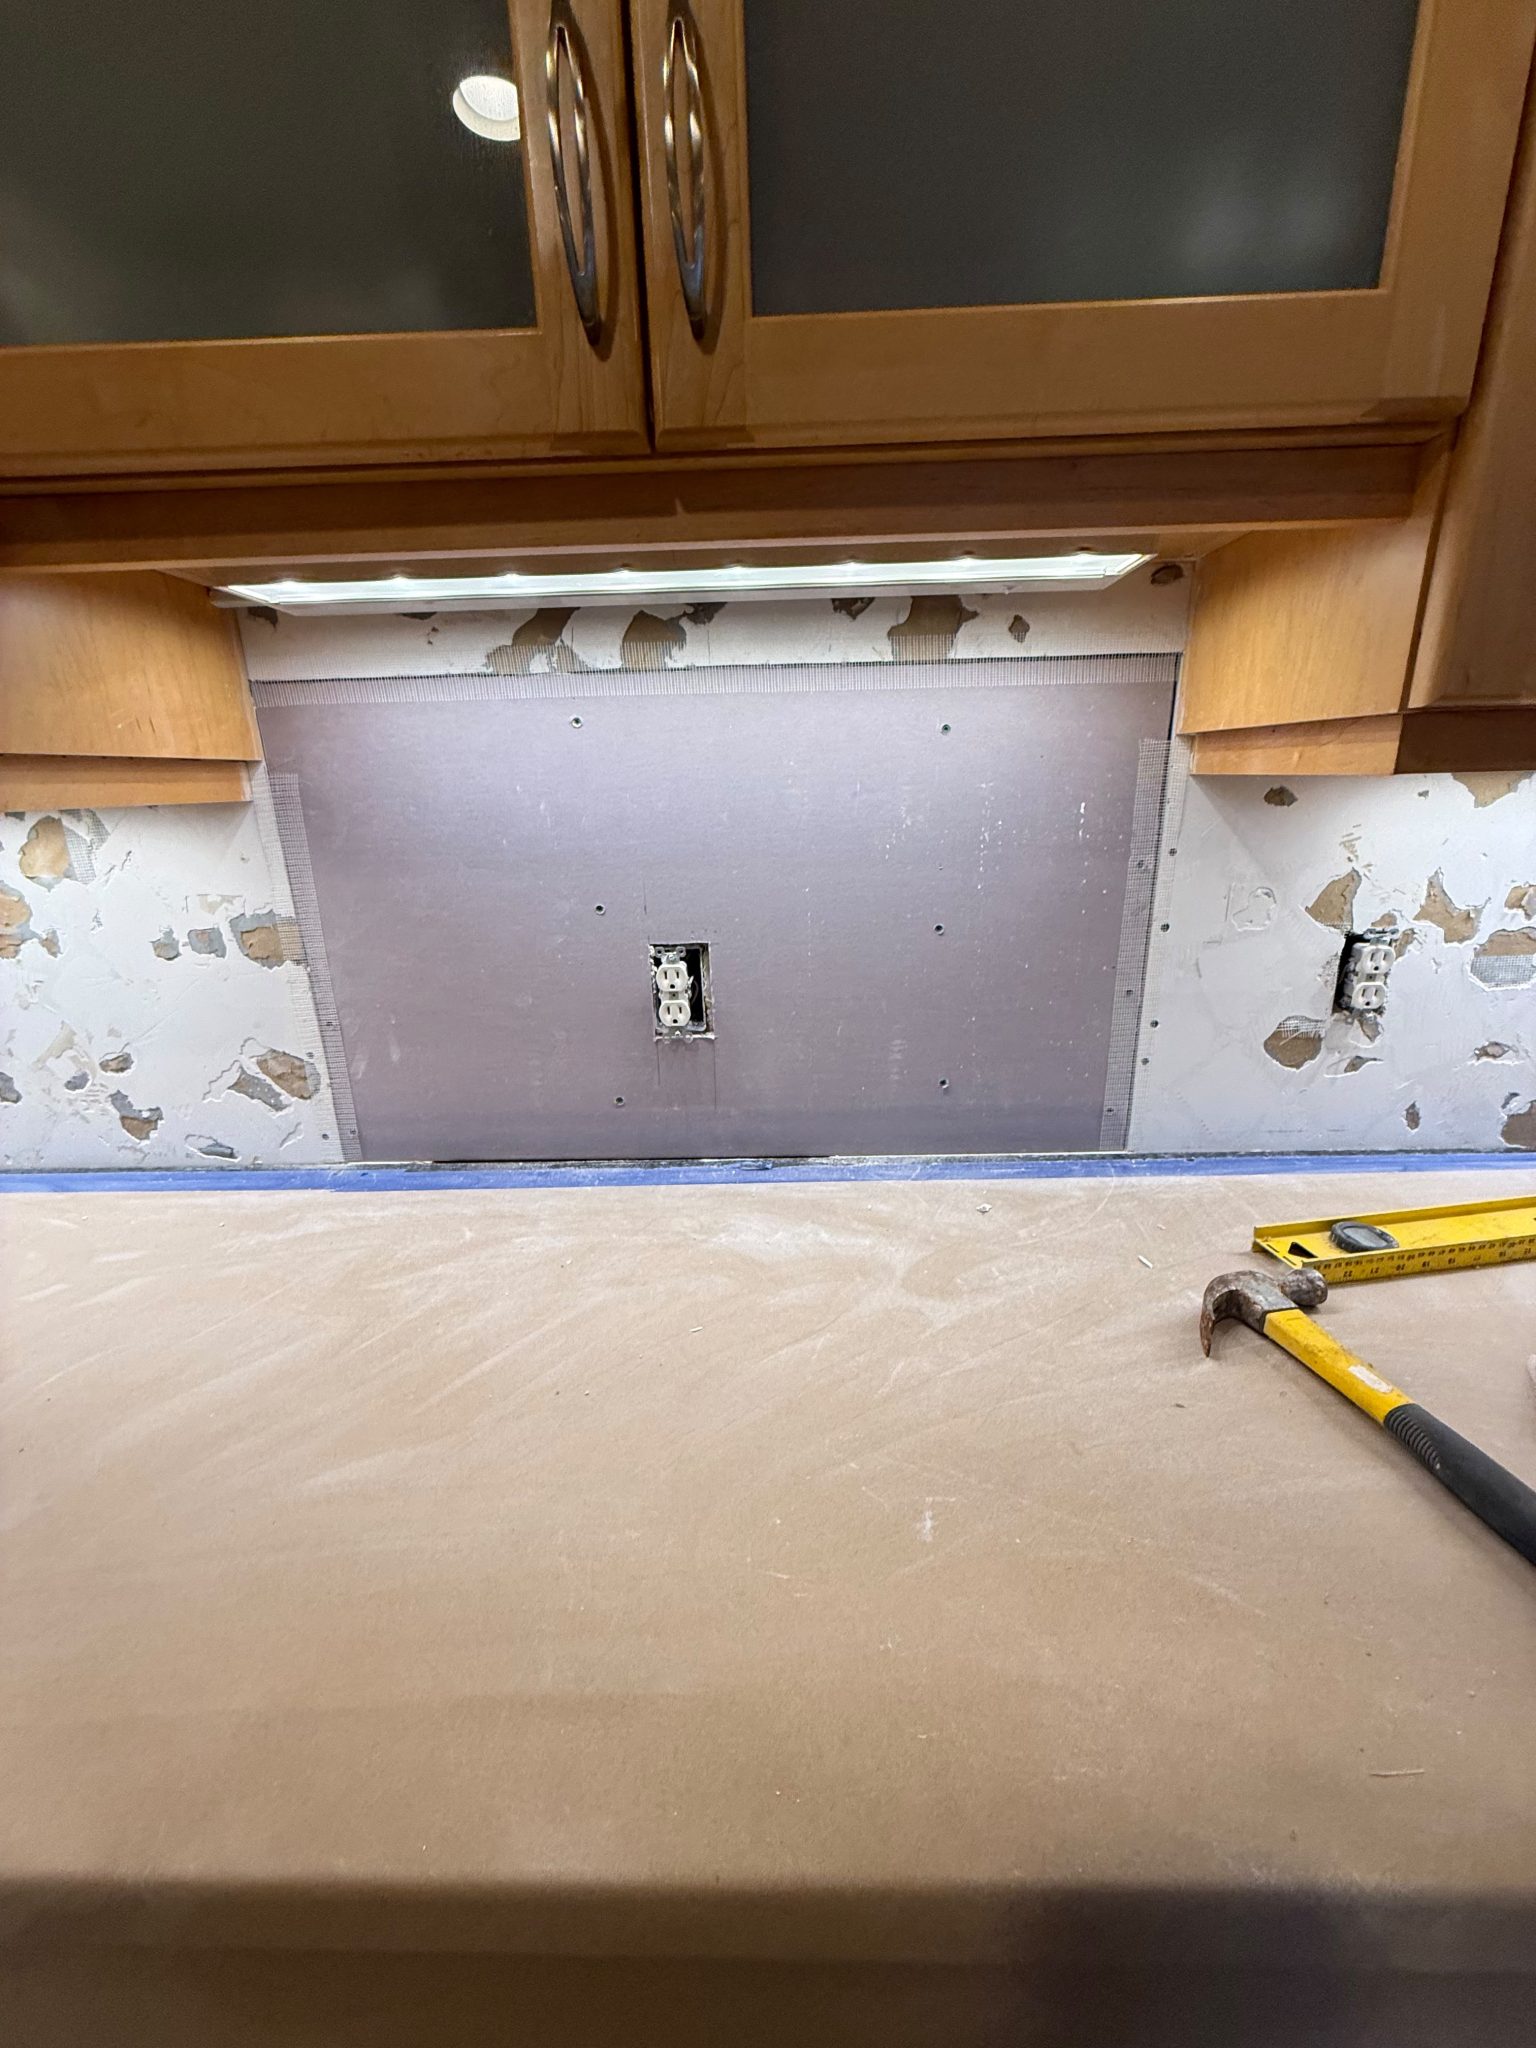
Once the old tile was off, we put a level against the wall and used it as a straightedge. The wall was out of flat. It bowed toward the room by about an inch in the middle.
Flat is not the same as level or plumb. Flat means the surface is one plane, so a straightedge touches it from end to end. An inch is a lot. ANSI A108.02, the standard tile installers work to, allows a wall getting tile this size to vary by 1/4 inch over 10 feet. This wall had about four times that.
The old backsplash matters to this story. The bow had been there the whole time and nobody had noticed, and that makes sense. The old tiles were small and square. A small tile with a lot of joints can follow a curve, and a diagonal pattern gives your eye no long straight line to check the wall against. The old backsplash was covering for the wall. The new tile would not. A long subway tile staggered 50/50 shows a bow like that, so it had to be dealt with before any tile went up.
Why a flat wall matters for a subway tile backsplash
A 3×12 subway tile in a brick pattern is the opposite of what was there before. It puts long, straight grout lines across the whole wall, and every tile is a rigid piece a foot long. Tile does not bend. Set a 12-inch tile across a curve and it rocks: one part sits tight to the wall and another part sits off it.
In a 50% offset, the end of every tile lands at the middle of the tile above and the tile below. On a wall that changes plane, those are the spots where one tile ends up proud of its neighbor. Installers call that lippage. This kitchen also has under-cabinet lights, and light that washes straight down the face of a wall throws a shadow off every edge that sticks out. A wall can look fine at noon and show every lip at night with those lights on.
The edges suffer too. The tile wants to run straight while the wall curves away from it, so the joint at the granite and at the cabinets comes out wide in one place and tight in another.
Could we have filled the difference with mortar? No. Thin-set is made to bond tile in a thin, even layer. With the middle of the wall sticking out, hiding it with mortar would have meant building up both ends by as much as an inch. Thin-set is not made for that, and using it that way is asking for trouble later. The other choice was to follow the bow and let the lines wave. On this tile, in this pattern, under those lights, the homeowner would have seen it every day.
How we handled the subway tile backsplash in Cohasset MA
We stopped before setting a single tile. We showed the homeowner the level on the wall and explained what it meant for the tile he had picked. He approved the repair that morning.
Then we fixed the wall. We opened the drywall where the wall bowed toward the room, shaved the stud in the middle back into line with the rest of the framing and hung new drywall. The seams were taped and finished and the wall was skimmed, so the whole run under the cabinets came out as one flat plane.

Only then did the tile go up. We set the 3×12 in a 50% offset with spacers at every joint to keep the lines straight and the joints even, and cut each piece around the outlets and switches. We grouted with Polyblend HP from Custom Building Products in the color Ash, a light gray, then caulked the joint where the tile meets the granite and where it meets the cabinets. Those joints get caulk instead of grout because two different materials meet there and move a little differently, and grout in that spot cracks.

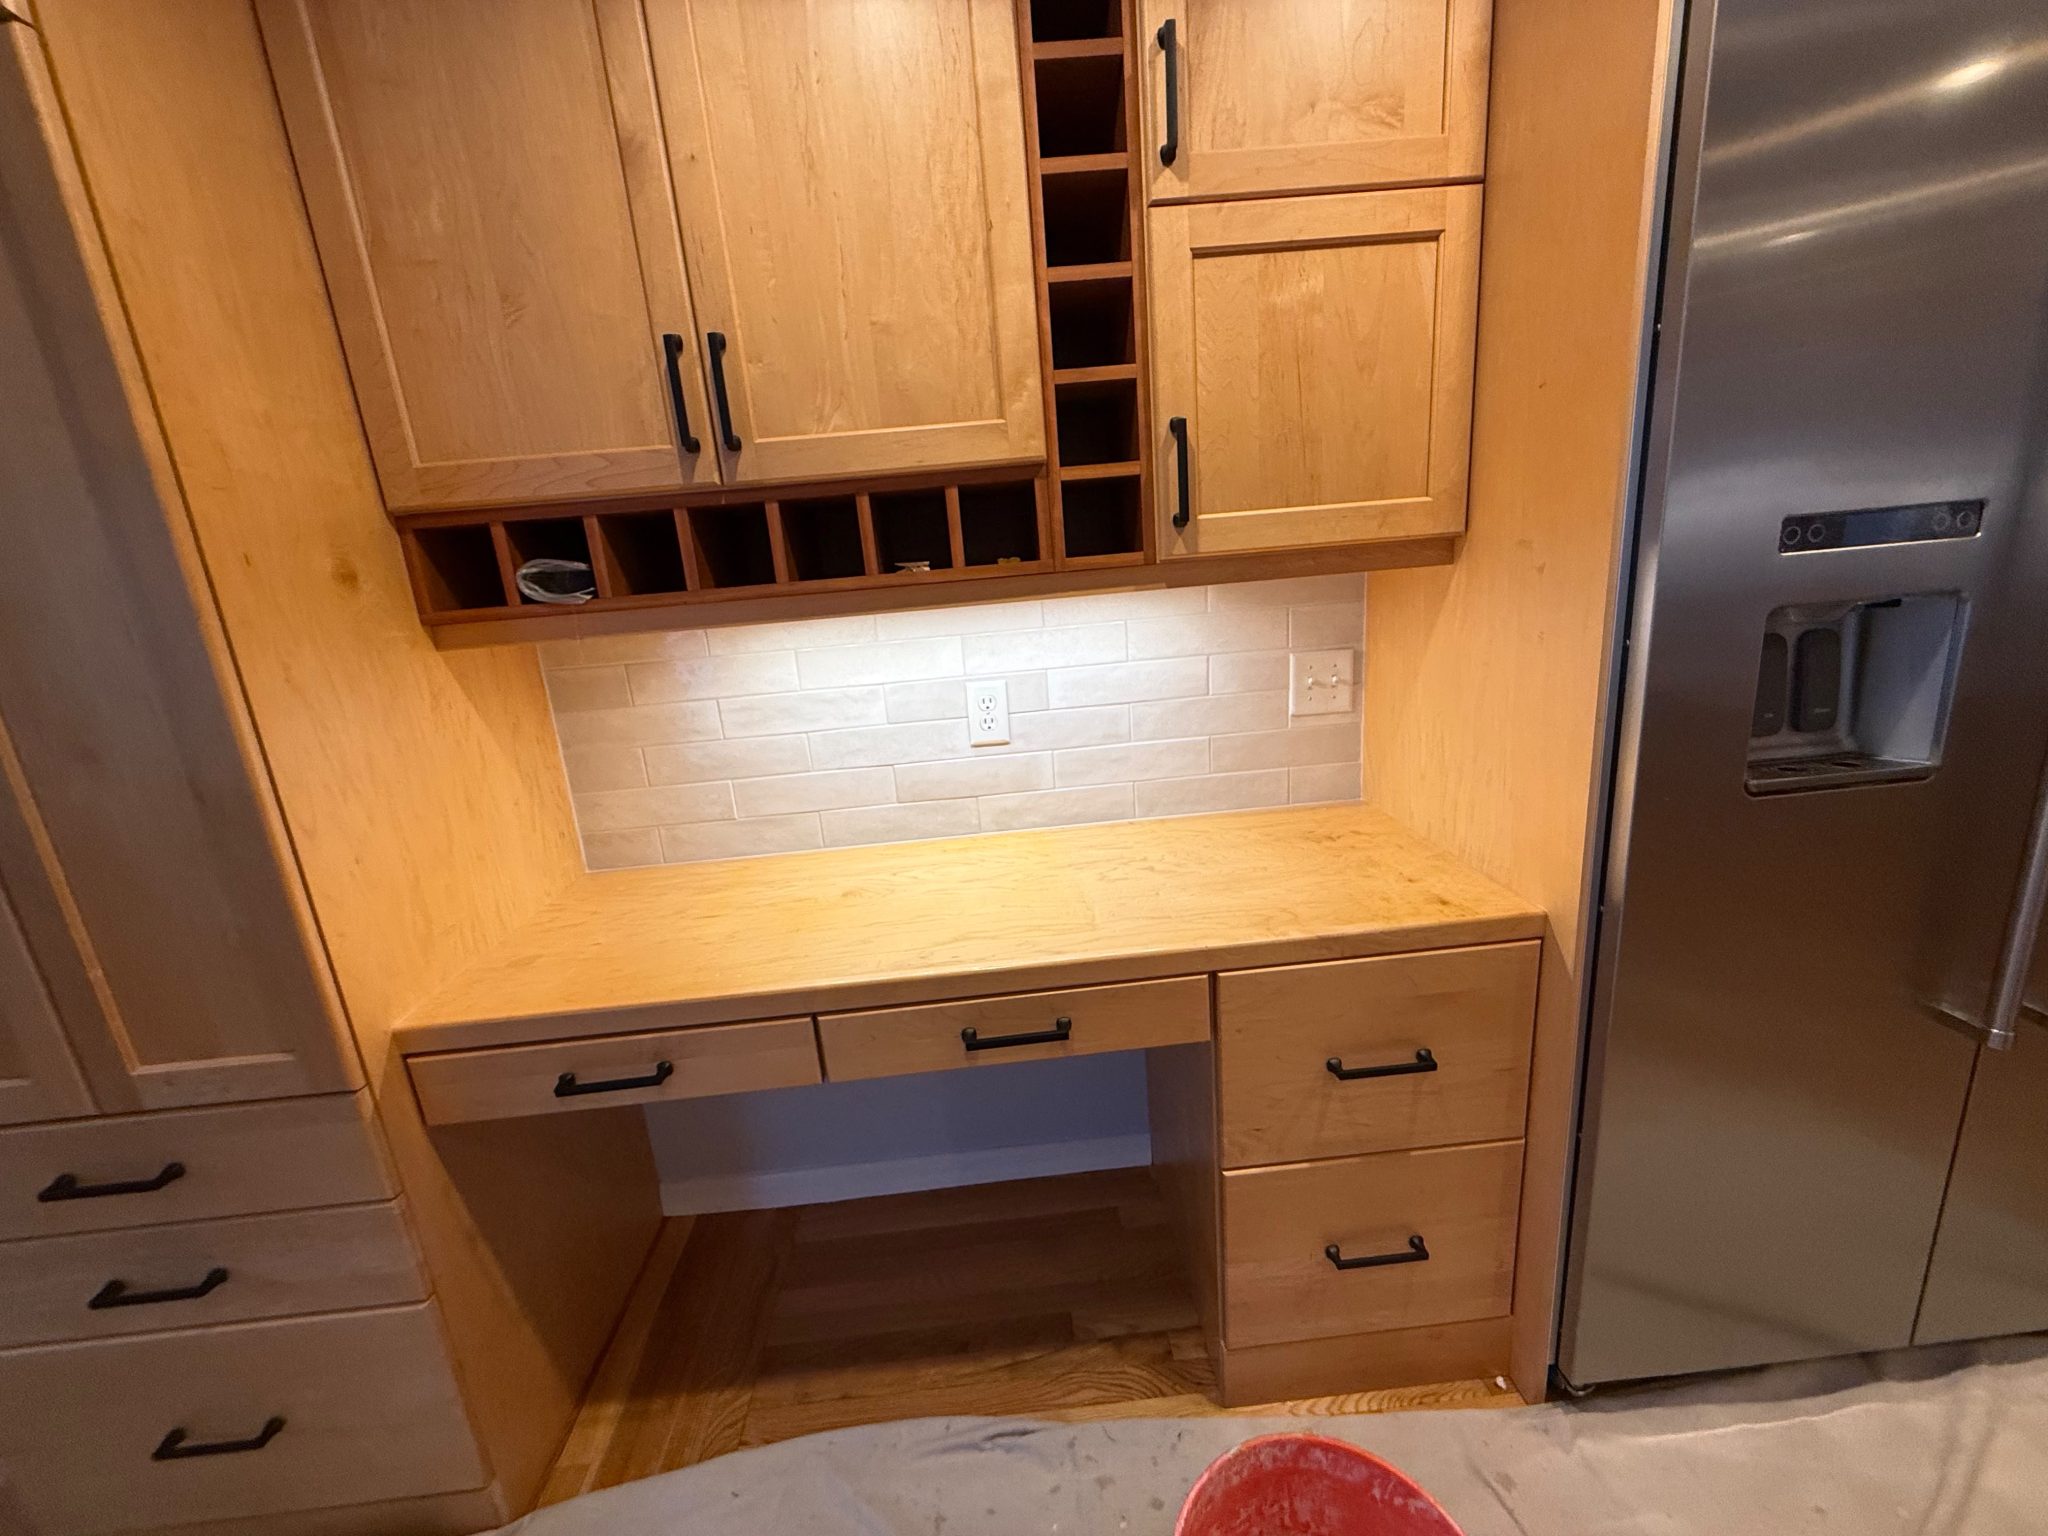
The desk wall was simpler. It was bare drywall and it was flat, so it went straight to tile: same 3×12, same offset, grouted and caulked the same way.
The result
The lines run straight from one end of the wall to the other. The under-cabinet lights wash down the tile without catching an edge. The tile meets the granite in one even caulk line. The warm white sits well next to the maple cabinets, and the desk wall matches the kitchen wall, so the two read as one job.
If you are planning a subway tile backsplash
Three things to take from this job. First, nobody can tell you what your wall looks like until the old tile is off. Ask your installer up front what happens if the wall turns out not to be flat. Second, the longer the tile and the straighter the pattern, the flatter the wall has to be. A wall that carried small tile for years can still be wrong for subway tile. Third, if your installer stops, puts a level on the wall and shows you a problem, that is the job going right. It is a lot easier to fix a wall while it is open than to live with wavy lines for as long as the tile is up.
I have been setting tile since 2001, and the answer has not changed: we fix what is underneath first. This subway tile backsplash in Cohasset MA got the same treatment as every backsplash tile installation we do. If you are in Cohasset or anywhere in Greater Boston and you are planning a backsplash, I am happy to take a look.

Davie Mac Tile installs backsplashes across Greater Boston, including Cohasset. Davi Santos is a CTI Certified Installer and NTCA member with 25 years of experience. Call (508) 728-9775 or see our backsplash tile installation page.